bauhaus_worksheet #3: Wheelbarrow
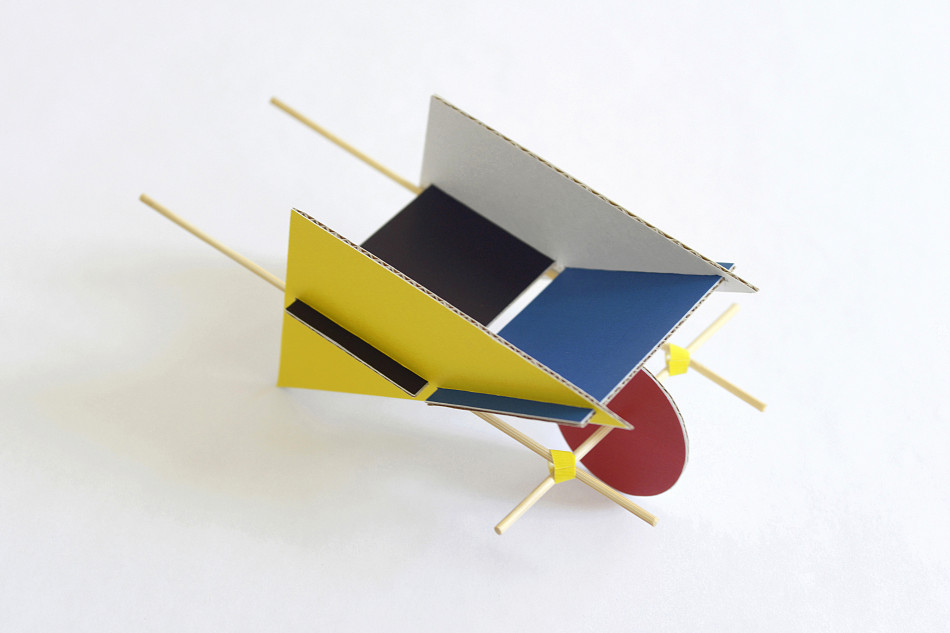
Gerrit Rietveld was a Dutch architect and designer. Influenced by the artists’ group De Stijl, he worked with geometric forms and the primary colours yellow, red and blue. His ideas were adopted by many at the Bauhaus. Using his “Child’s Wheelbarrow” (1923) for inspiration, you can build your own mini cardboard wheelbarrow and get triangles, rectangles and circles rolling!
Download the bauhaus_worksheet #3 (PDF)
You’ll need
– cardboard
– printer
– glue
– scissors
– hobby knife
– ruler
– 3 wooden sticks
– tape
Instructions
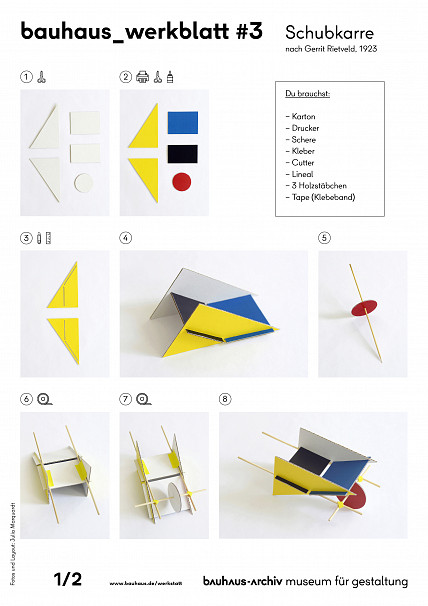
& 2. Print out the patterns and glue them onto a stiff piece of cardboard. Cut out each of the pieces.
Use the hobby knife and ruler to make slits along the marks printed on the triangular pieces. The slits should be just wide enough to insert the rectangular pieces.
Insert the ends of the rectangles into the triangles.
Poke the wooden stick through the centre of the circle. This is the axle for your wheelbarrow.
With tape, attach the other two wooden sticks to the underbelly of the wheelbarrow along the left and right sides.
Cut the tape into thin strips. Lay the two sidelong sticks onto the wheel axle and affix them by wrapping the tape around them. If the sticks are too long, you can shorten them with the scissors.
All done! Now you can push your wheelbarrow.
Concept: Julia Marquardt


